CaptJager
Moderator
This was posted by MrViper700 on TY He gave me permission to post it here as well as post the pdf
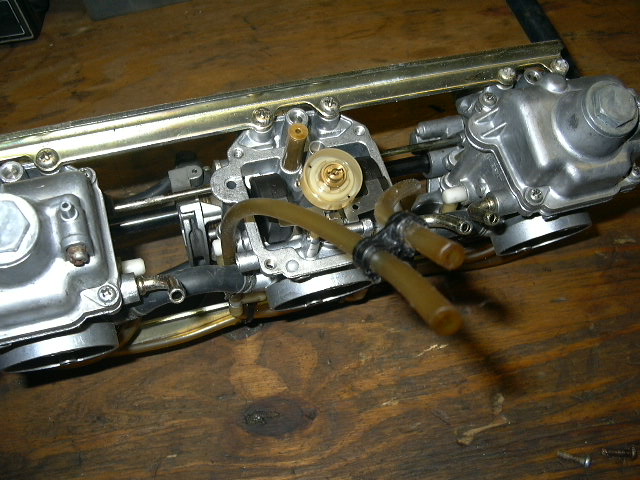
Due to the recent overflow of carb related questions/problems, I see theres a bunch of people intimidated by simply cleaning the carbs, they are simple inside and maybe some can see how easy it is to maintain your sled and prevent all the "just out of storage" running problems. Heres what your looking at and what to look for and clean.
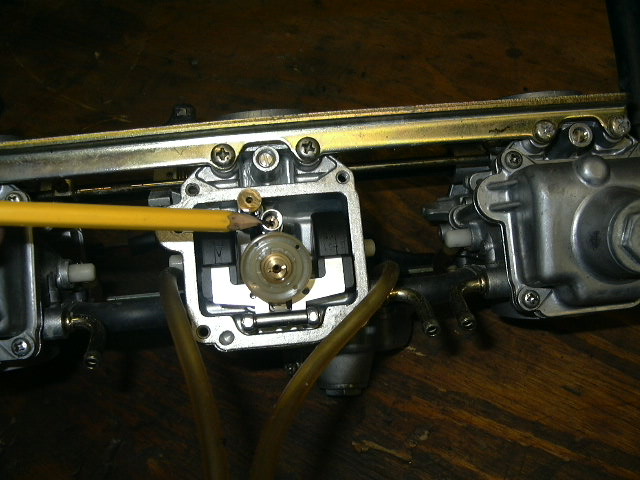
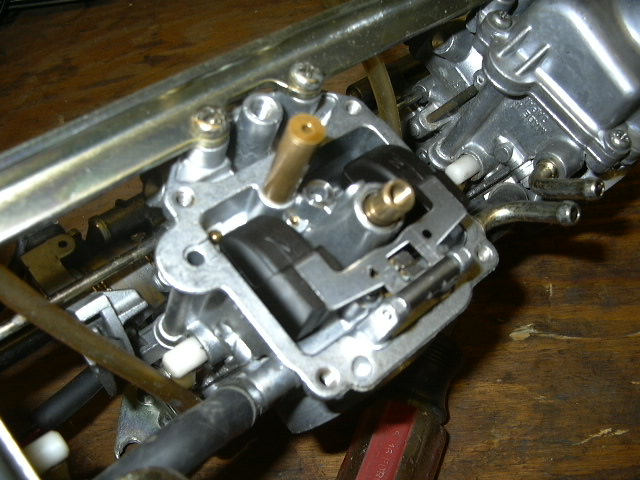
This is what you will see when you remove the 4 phillips head screws holding on the float bowl
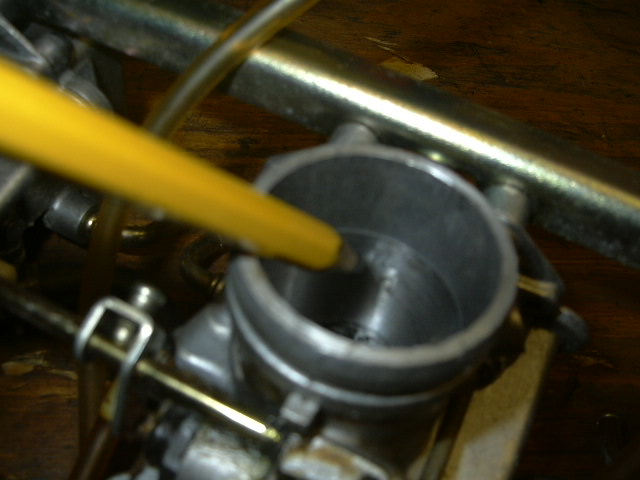
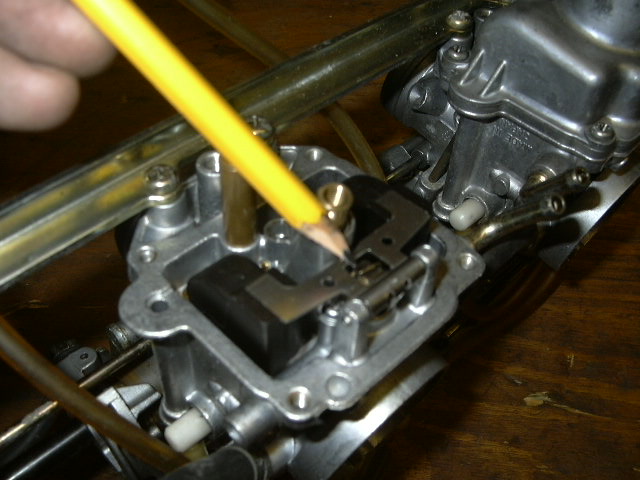
This is the Pilot jet location
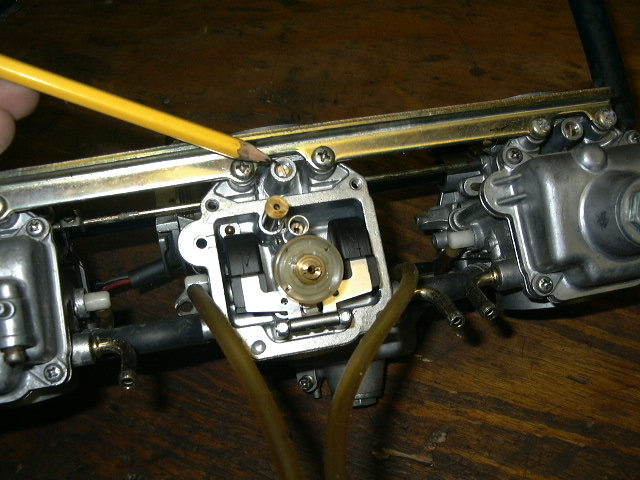
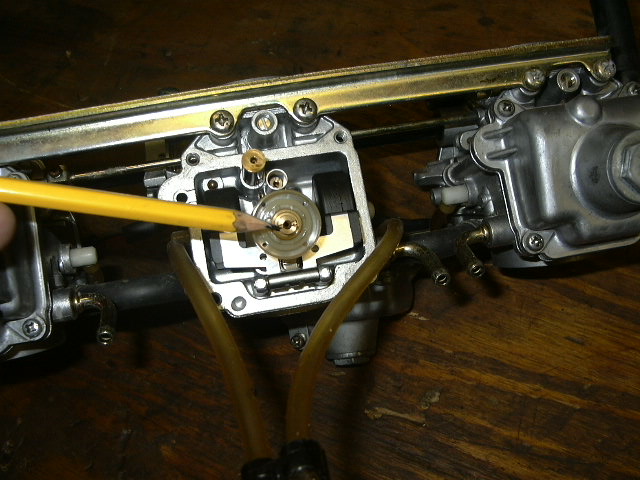
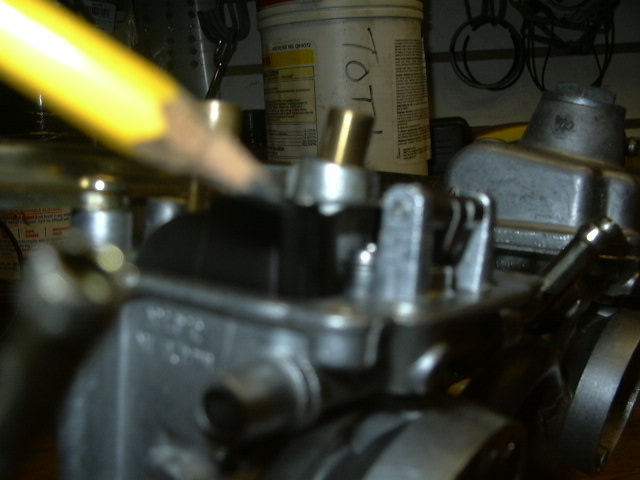
This is your main jet location

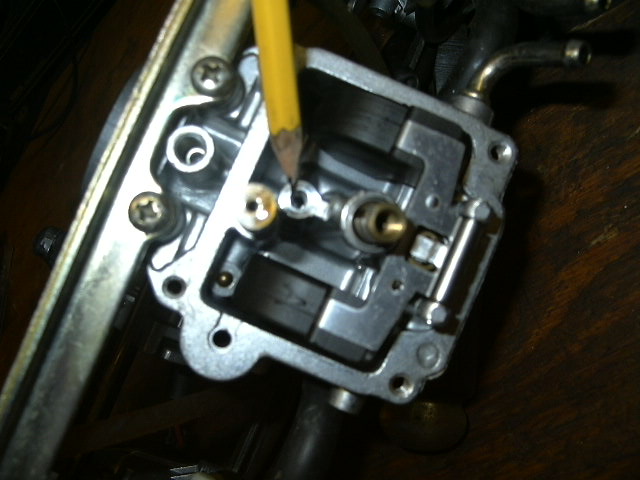
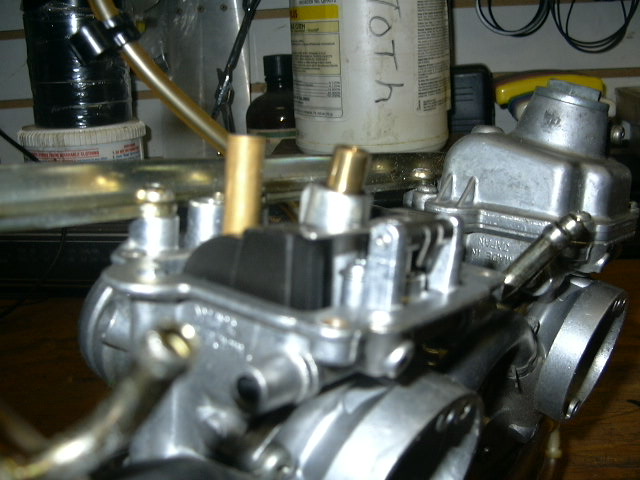
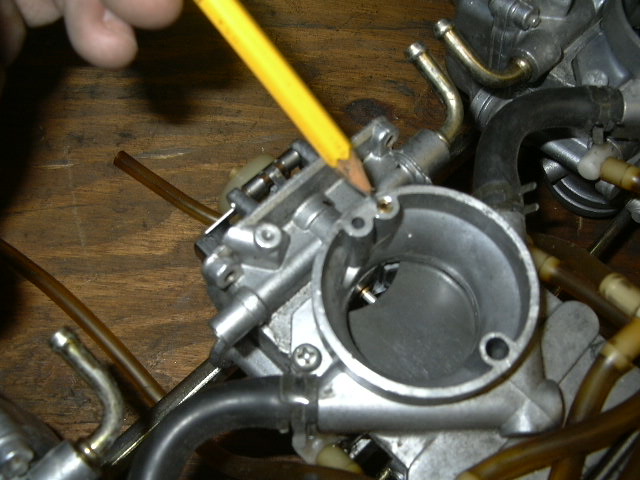
This is where the fuel screw is located
your first step is to remove the pilot jet and the tube, youll want to clean out the pilot jet and holding it up to a light, you should be able to see light thru the jet, if you cant, you need to get a single strand of copper wire and carefully twist the wire/jet till it will break thru the crud. (dont use a torch tip cleaners as for 1 they dont have a sharp enuff tip and 2 they will make the jet bigger with the side teeth on them once you get it thru the hole)
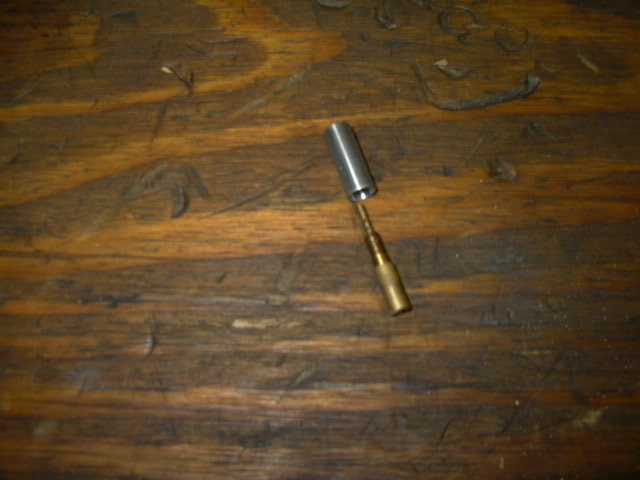
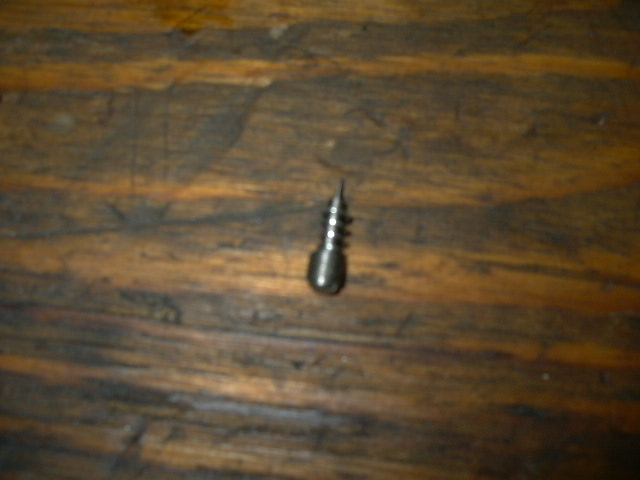
Then clean well with carb cleaner and reinspect to see light thru the jet. The pic shows the jet removed. notice all the small holes on outside of it as well.
Once you have the jet cleaned, you want to insert the hose of the carb clean can into the pilot jet orfice and squirt it in there, it should come out the front of the carb(thru the fuel screw orfice feedhole), if the fluid does come out, this means the carb has no restriction in it and your good to go.
next you can remove the fuel screw and spring assembly,and inspect it, clean it. You will find most of the time this to just have some crud build up but not be blocked, this is also the time to reset your fuel screws if you have had previous idle hang problems commonly found on yamaha sleds with the flatslide carbs. The fuel screw setting are from a LIGHTLY seated(in all the way) to turns counted going counter clockwise, so if your setting was for example: 1.25 turns, that means all the way in to just barely snug, then turn the screw driver 1 complete 360 degree revolution and then a quarter of a turn. more, see its simple!
time to clean and inspect the main jet, its located here. You will also note the large plastic housing below the jet , this keeps fuel around the main jet so the fuel doesnt run away from the jet making for a lean condition on take off, jumps, bumps, etc. This just sits on the jet nozzle, the jet nozzle is the brass item you will see when you remove the main jet and plastic shield. Be carefull when you tighten down the jets, they are only brass, as are the nozzles in which the main jet screws into. Dont get carried away tightening them.
Moving right along we come to the needle and seat and the float, most times you wont have any problems here, but sometimes the needle and seat will need replaced due to it leaking or damage. there is a pin thats pressed into the 2 tangs on the carb, be very carefull when trying to remove this, do not ever strike it with something to remove it as you can easily break off the cast tang from the carb body and then your screwed.
This is also where you will check your float height, this is from the bowl surface to the metal float arm, there are specs in the tech section for your measurement, but a good rule of thumb that will get you thru almost everytime is adjust it till its parallel to the carb float bowl machined surface. You bend the little tang on the float arm that contacts the needle assembly, you can bend it with a penlight screwdriver-gently!
lastly, your gonna want to squirt carb cleaner and air thru the air bleeds in the back of the carb, you will also see this is where your air jet is, there is no adjustment for them, they are screwed down tight, these control how much air the idle and low speed circuit recieves, make sure the carb cleaner and air go thru the carb and are unobstructed. These are also brass so dont be the hulk and strip them out.
Thanks MrViper700 for the great How to.....
Eric
Due to the recent overflow of carb related questions/problems, I see theres a bunch of people intimidated by simply cleaning the carbs, they are simple inside and maybe some can see how easy it is to maintain your sled and prevent all the "just out of storage" running problems. Heres what your looking at and what to look for and clean.
This is what you will see when you remove the 4 phillips head screws holding on the float bowl
This is the Pilot jet location
This is your main jet location
This is where the fuel screw is located
your first step is to remove the pilot jet and the tube, youll want to clean out the pilot jet and holding it up to a light, you should be able to see light thru the jet, if you cant, you need to get a single strand of copper wire and carefully twist the wire/jet till it will break thru the crud. (dont use a torch tip cleaners as for 1 they dont have a sharp enuff tip and 2 they will make the jet bigger with the side teeth on them once you get it thru the hole)
Then clean well with carb cleaner and reinspect to see light thru the jet. The pic shows the jet removed. notice all the small holes on outside of it as well.
Once you have the jet cleaned, you want to insert the hose of the carb clean can into the pilot jet orfice and squirt it in there, it should come out the front of the carb(thru the fuel screw orfice feedhole), if the fluid does come out, this means the carb has no restriction in it and your good to go.
next you can remove the fuel screw and spring assembly,and inspect it, clean it. You will find most of the time this to just have some crud build up but not be blocked, this is also the time to reset your fuel screws if you have had previous idle hang problems commonly found on yamaha sleds with the flatslide carbs. The fuel screw setting are from a LIGHTLY seated(in all the way) to turns counted going counter clockwise, so if your setting was for example: 1.25 turns, that means all the way in to just barely snug, then turn the screw driver 1 complete 360 degree revolution and then a quarter of a turn. more, see its simple!
time to clean and inspect the main jet, its located here. You will also note the large plastic housing below the jet , this keeps fuel around the main jet so the fuel doesnt run away from the jet making for a lean condition on take off, jumps, bumps, etc. This just sits on the jet nozzle, the jet nozzle is the brass item you will see when you remove the main jet and plastic shield. Be carefull when you tighten down the jets, they are only brass, as are the nozzles in which the main jet screws into. Dont get carried away tightening them.
Moving right along we come to the needle and seat and the float, most times you wont have any problems here, but sometimes the needle and seat will need replaced due to it leaking or damage. there is a pin thats pressed into the 2 tangs on the carb, be very carefull when trying to remove this, do not ever strike it with something to remove it as you can easily break off the cast tang from the carb body and then your screwed.
This is also where you will check your float height, this is from the bowl surface to the metal float arm, there are specs in the tech section for your measurement, but a good rule of thumb that will get you thru almost everytime is adjust it till its parallel to the carb float bowl machined surface. You bend the little tang on the float arm that contacts the needle assembly, you can bend it with a penlight screwdriver-gently!
lastly, your gonna want to squirt carb cleaner and air thru the air bleeds in the back of the carb, you will also see this is where your air jet is, there is no adjustment for them, they are screwed down tight, these control how much air the idle and low speed circuit recieves, make sure the carb cleaner and air go thru the carb and are unobstructed. These are also brass so dont be the hulk and strip them out.
Thanks MrViper700 for the great How to.....
Eric


